
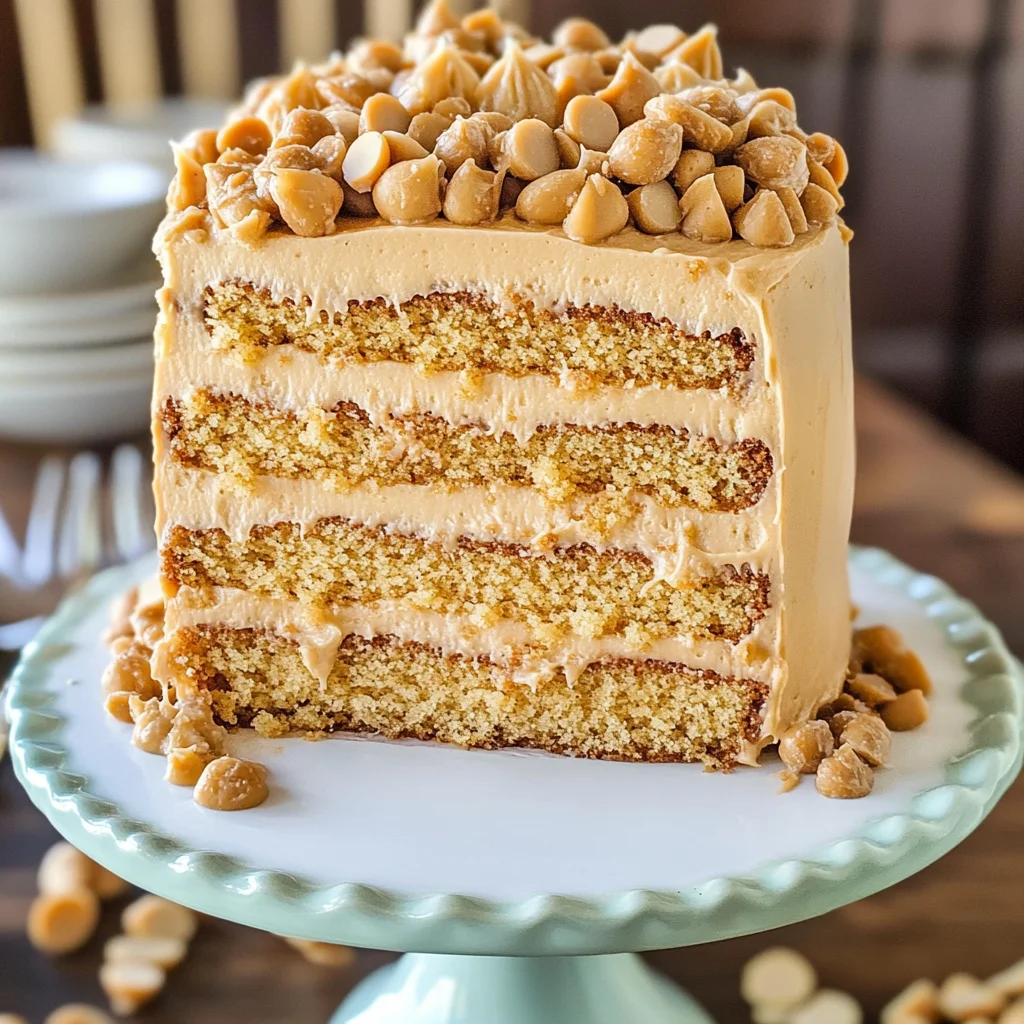
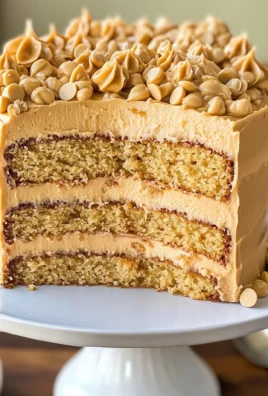
If you’re looking for a show-stopping dessert that will make any peanut butter lover swoon, then you’re in the right place! This Loaded Peanut Butter Layer Cake is not just a cake; it’s a celebration of everything delicious about peanut butter. The layers are rich and moist, and the frosting is creamy and indulgent. Every slice is packed with peanut butter goodness, making it the perfect treat for birthdays, family gatherings, or even just a cozy night at home. Trust me, once you make this cake, it will quickly become a favorite!
This recipe is special to me because it’s one of those desserts that brings people together. Whether it’s for a casual weeknight dinner or a festive holiday feast, this cake never fails to impress. Plus, it’s surprisingly easy to whip up—even if you’re not an experienced baker!
Why You’ll Love This Recipe
- Easy to make: With straightforward steps and simple ingredients, you’ll have this cake ready in no time!
- Family-friendly appeal: Kids and adults alike adore the rich peanut butter flavor.
- Perfect for any occasion: Birthdays, holidays, or just because—this cake fits right in.
- Make-ahead convenience: You can prepare it a day in advance and let the flavors meld overnight.
- Decadent flavor: The combination of peanut butter in every layer makes each bite absolutely divine.
Ingredients You’ll Need
Let’s gather our simple and wholesome ingredients for this delightful Loaded Peanut Butter Layer Cake. You might already have some of these staples in your pantry!
For the Cake
- 1/2 cup (112g) unsalted butter, room temperature
- 3/4 cups (155g) sugar
- 3/4 cup (108g) brown sugar, loosely packed
- 3/4 cup (210g) peanut butter
- 1/2 cup (115g) sour cream
- 2 tsp vanilla extract
- 3 large eggs
- 2 1/2 cups (325g) all-purpose flour
- 2 3/4 tsp baking powder
- 1/2 tsp salt
- 1/2 cup (120ml) milk
- 1/4 cup (60ml) water
For the Frosting
- 2 cups (448g) salted butter, room temperature
- 1 1/4 cups (350g) peanut butter
- 9 cups (1035g) powdered sugar
- 6-7 tbsp (90-105ml) water or milk
For the Decorations
- 10 oz peanut butter chips
- 6 oz peanut butter chips
- 1/2 cup (120ml) heavy whipping cream
Variations
One of the best things about this Loaded Peanut Butter Layer Cake is its flexibility! Here are some fun variations to suit your taste:
- Add chocolate: Mix in chocolate chips for an extra layer of flavor!
- Nutty crunch: Sprinkle crushed peanuts between layers for added texture.
- Different frostings: Try swapping out the frosting with chocolate ganache for a twist.
- Gluten-free option: Substitute all-purpose flour with your favorite gluten-free blend.
How to Make Loaded Peanut Butter Layer Cake
Step 1: Prepare the Cake Batter
Start by preheating your oven to 350°F (175°C). In a large mixing bowl, cream together the unsalted butter, sugar, and brown sugar until fluffy. This step is crucial as it incorporates air into the mixture which helps your cake rise beautifully. Then add in the peanut butter, sour cream, and vanilla extract until well combined. Next, beat in the eggs one at a time. Mixing them in gradually ensures they incorporate evenly into your batter.
Step 2: Combine Dry Ingredients
In another bowl, whisk together the all-purpose flour, baking powder, and salt. Gradually add these dry ingredients to your wet mixture while alternating with milk and water. This method prevents lumps and gives you a smooth batter that’s ready to bake!
Step 3: Bake Your Layers
Divide the batter evenly between two greased round cake pans. Bake for about 23 minutes or until a toothpick inserted comes out clean. Let them cool in the pans for about 10 minutes before transferring them onto wire racks. Cooling is key here; it prevents soggy layers when you frost them.
Step 4: Make the Frosting
While your cakes are cooling down, let’s whip up that dreamy frosting! In a large bowl, beat together salted butter and peanut butter until creamy. Gradually add powdered sugar while mixing on low speed to avoid a sugary cloud! Adjust consistency with water or milk until you reach your desired thickness.
Step 5: Assemble Your Cake
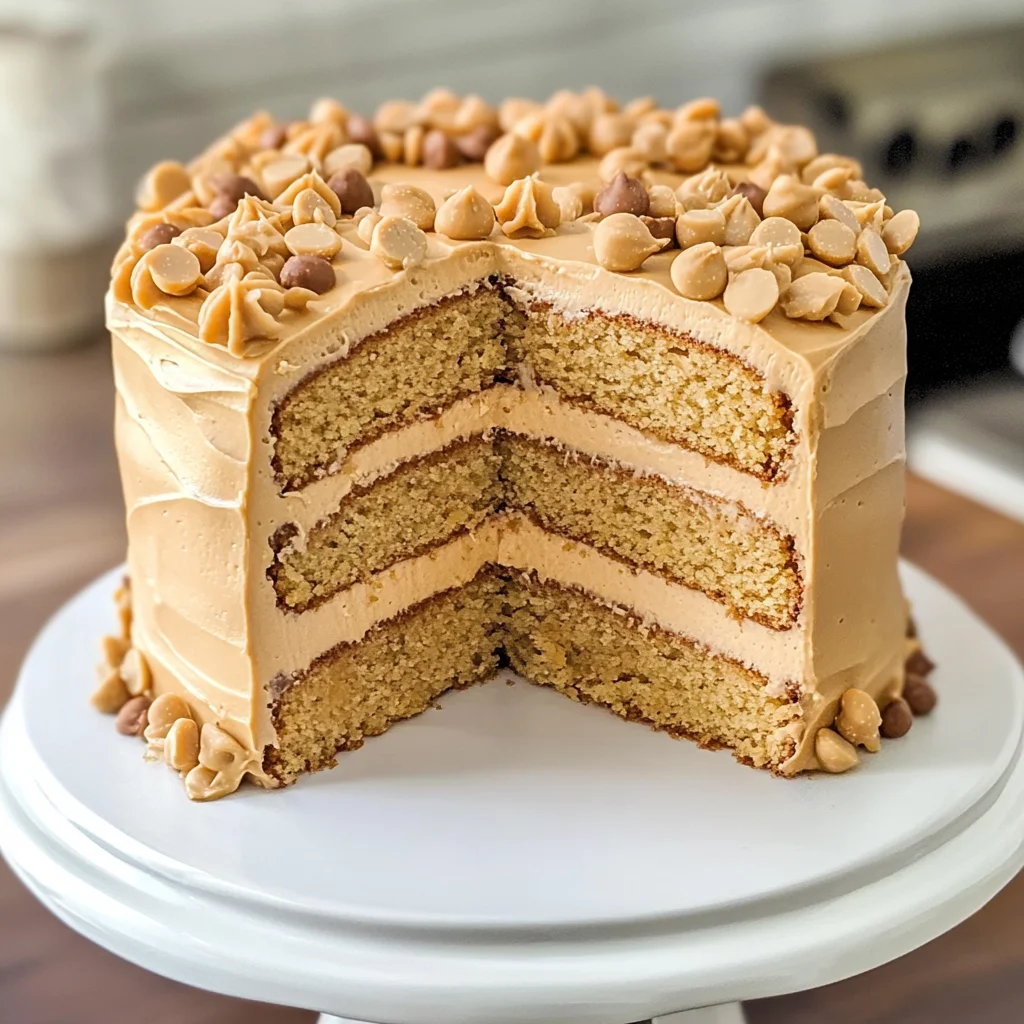
Once your cakes are completely cooled, spread a generous layer of frosting on top of one layer before placing the second layer on top. Frost the top and sides generously. For an added touch of decadence, sprinkle those delicious peanut butter chips on top!
Step 6: Serve & Enjoy!
Slice into this beautiful Loaded Peanut Butter Layer Cake and watch everyone delight in its flavor! Each bite offers rich peanut buttery goodness that makes this dessert truly unforgettable.
Now that you’ve crafted this masterpiece, sit back and enjoy every bite!
Pro Tips for Making Loaded Peanut Butter Layer Cake
Creating the perfect Loaded Peanut Butter Layer Cake is easier than you think! With just a few helpful tips, you can elevate your baking game and impress your family and friends.
- Use room temperature ingredients: Bringing your butter, eggs, and sour cream to room temperature ensures they mix more smoothly, creating a lighter cake texture.
- Measure flour correctly: Spoon your flour into the measuring cup and level it off with a knife. This prevents overpacking, which can lead to a dense cake.
- Don’t overmix the batter: Mix just until combined to keep your cake light and fluffy. Overmixing can develop gluten, resulting in a tougher texture.
- Check for doneness: Use a toothpick inserted into the center of the cake; if it comes out clean or with a few crumbs, it’s ready! This helps prevent overbaking, ensuring a moist cake.
- Cool completely before frosting: Allow the layers to cool on wire racks before frosting. This step prevents the frosting from melting and sliding off, giving you that perfect layer cake look.
How to Serve Loaded Peanut Butter Layer Cake
Serving this decadent Loaded Peanut Butter Layer Cake can be as delightful as making it! Here are some fun ideas to present this treat that will wow your guests.
Garnishes
- Chopped peanuts: Sprinkle some chopped peanuts on top for added crunch and a burst of flavor that complements the peanut butter beautifully.
- Drizzle of chocolate sauce: A drizzle of chocolate sauce adds a rich contrast to the peanut butter taste while making your cake visually appealing.
- Fresh berries: Arrange fresh strawberries or raspberries around the base of the cake for a pop of color and freshness that balances the richness.
Side Dishes
- Vanilla ice cream: The creamy texture and sweet flavor of vanilla ice cream perfectly pair with the rich layers of peanut butter cake, creating an indulgent dessert experience.
- Fruit salad: A refreshing fruit salad provides a light contrast to the heavy richness of the cake. Opt for seasonal fruits for added sweetness and vibrancy.
- Chocolate mousse: A light chocolate mousse offers an elegant touch alongside your cake. Its smoothness complements the dense layers without overwhelming them.
- Coffee or tea: Serving coffee or tea enhances the dessert experience by providing warmth and balance to this sweet treat. Choose a robust brew or herbal tea based on preference!
With these serving suggestions and pro tips in hand, you’re all set to create an unforgettable Loaded Peanut Butter Layer Cake experience! Enjoy every slice!
Make Ahead and Storage
This Loaded Peanut Butter Layer Cake is not only a joy to make but also fantastic for meal prep! You can prepare it in advance, allowing the flavors to meld beautifully and making it easier for you to serve when you’re ready.
Storing Leftovers
- Store leftover cake in an airtight container at room temperature for up to 3 days.
- For longer storage, refrigerate the cake for up to a week.
- If you’ve decorated your cake with peanut butter chips or frosting, keep it sealed in the fridge to prevent drying out.
Freezing
- Freeze individual slices of the Loaded Peanut Butter Layer Cake by wrapping them tightly in plastic wrap and then placing them in a freezer-safe bag.
- The cake can be frozen for up to 3 months; just remember to label the bags with the date.
- To thaw, simply transfer slices to the refrigerator overnight before serving.
Reheating
- If you prefer a warm slice, gently microwave individual pieces for about 10-15 seconds.
- Alternatively, place slices in a preheated oven at 350°F (175°C) for about 5-10 minutes until warmed through.
FAQs
Here are some common questions about making this delicious dessert!
What makes the Loaded Peanut Butter Layer Cake so special?
The Loaded Peanut Butter Layer Cake is special because it’s truly packed with peanut butter flavor. With layers of peanut butter cake, rich frosting, and delightful decorations, it’s a celebration of everything peanut butter lovers adore!
Can I use natural peanut butter for this Loaded Peanut Butter Layer Cake?
Yes, you can use natural peanut butter! Just ensure it’s creamy and well-mixed to avoid any separation during baking. The taste may vary slightly, but it will still be delicious!
How do I ensure my Loaded Peanut Butter Layer Cake stays moist?
To keep your cake moist, avoid overbaking and always check with a toothpick before the recommended baking time is up. Additionally, using sour cream in the batter helps maintain moisture.
Can I substitute any ingredients in this Loaded Peanut Butter Layer Cake recipe?
Absolutely! If you’re looking for alternatives, you can use non-dairy yogurt instead of sour cream and oat milk instead of regular milk. Just ensure that your substitutions are compatible with your dietary preferences.
Final Thoughts
I hope you feel inspired to whip up this Loaded Peanut Butter Layer Cake! It’s not just a treat; it’s an experience filled with rich flavors that will delight anyone who takes a bite. Enjoy every moment of baking and indulging in this scrumptious cake—it’s sure to become a favorite. Happy baking!
Loaded Peanut Butter Layer Cake
Indulge in the rich, creamy delight of our Loaded Peanut Butter Layer Cake—a dessert that celebrates the irresistible flavor of peanut butter in every bite. Perfect for any occasion, this cake features moist layers paired with a decadent peanut butter frosting that will have everyone coming back for seconds. Whether it’s a birthday, holiday gathering, or a cozy night in, this easy-to-make cake is sure to impress both kids and adults alike. Plus, it’s simple enough for even beginner bakers to whip up!
- Prep Time: 20 minutes
- Cook Time: 23 minutes
- Total Time: 43 minutes
- Yield: Serves approximately 12 slices 1x
- Category: Dessert
- Method: Baking
- Cuisine: American
Ingredients
- 1/2 cup (112g) unsalted butter, room temperature
- 3/4 cups (155g) sugar
- 3/4 cup (108g) brown sugar, loosely packed
- 3/4 cup (210g) peanut butter
- 1/2 cup (115g) sour cream
- 2 tsp vanilla extract
- 3 large eggs
- 2 1/2 cups (325g) all-purpose flour
- 2 3/4 tsp baking powder
- 1/2 tsp salt
- 1/2 cup (120ml) milk
- 1/4 cup (60ml) water
- 2 cups (448g) salted butter, room temperature for frosting
- 1 1/4 cups (350g) peanut butter for frosting
- 9 cups (1035g) powdered sugar for frosting
- 6–7 tbsp (90-105ml) water or milk for frosting
- 10 oz peanut butter chips for decoration
- 6 oz peanut butter chips for decoration
- 1/2 cup (120ml) heavy whipping cream for decoration
Instructions
- Preheat your oven to 350°F (175°C). Cream together room temperature butter, sugar, and brown sugar until fluffy.
- Mix in peanut butter, sour cream, and vanilla extract until well combined. Beat in eggs one at a time.
- In another bowl, whisk together flour, baking powder, and salt. Gradually add to the wet mixture alternating with milk and water.
- Divide batter into greased round cake pans and bake for about 23 minutes or until a toothpick comes out clean.
- Cool cakes before frosting them with a creamy peanut butter frosting made from salted butter and powdered sugar.
Nutrition
- Serving Size: 1 slice (120g)
- Calories: 482
- Sugar: 38g
- Sodium: 210mg
- Fat: 22g
- Saturated Fat: 8g
- Unsaturated Fat: 12g
- Trans Fat: 0g
- Carbohydrates: 65g
- Fiber: 2g
- Protein: 8g
- Cholesterol: 55mg
Leave a Comment